Overview
Cube writeback will first need to be added to your license if you did not purchase this feature initially. To add this feature to your license please contact your regional licensing department for details.
Cube writeback is used for budgeting, forecasting or any other scenario in which you need to enter data into your reporting structure. As an example you can imagine a budgeting scenario where actuals is provided by the source systems, while the budget amounts are entered in a front-end application such as Excel or Calumo.
The values entered manually are stored in a separate partition on the data warehouse and merged with the fact table. When using the Jet Data Manager, the write back partition is created and maintained automatically, even if the structure of the fact table changes.
Performance
When using writeback, Analysis Services will take the value entered and systematically prorate it across every dimension within the cube. For this reason, it is recommended that you only use writeback on cubes that have been designed specifically for this purpose. Using writeback on cubes with many dimensions will require a very powerful machine acting as the server. If your server does not have the resources to process writeback against a cube with too many dimensions, you will receive out of memory errors from the client end. For the best experience, design a cube that is primarily used for the writeback feature including only the dimensions necessary for the analysis you will be performing.
Step 1: Granting Writeback Permissions
Step 2: Enabling Writeback on a Cube
Step 3: Enabling Writeback within Excel
-
Granting Writeback Permissions
The first step to implementing writeback on your SSAS Multidimensional OLAP cubes is to grant the security permissions to an OLAP Security Role within the Jet Data Manager. To do so, first navigate to the Cubes tab of the Jet Data Manager.
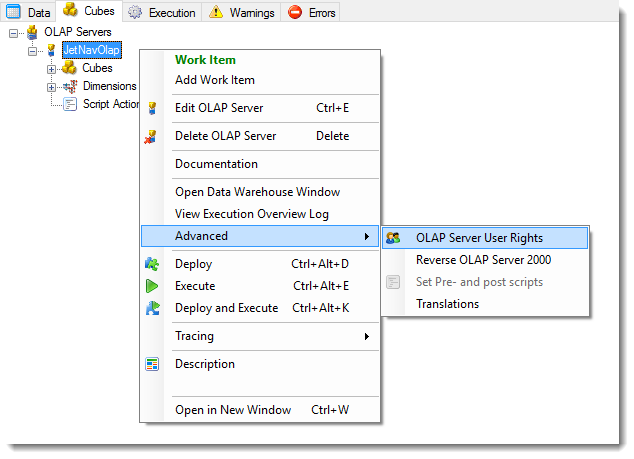
From here, right-click on your OLAP server name and select Advanced -> OLAP Server User Rights as shown below.
In the OLAP Access Control window that opens, first click on Cubes in the left-hand pane (1). Next, identify the role and cube that you want to grant writeback permissions to and click on the dropdown arrow to select which permission set to grant (2). Typically this will be either the Read/Write option or the Write with Drillthrough option.
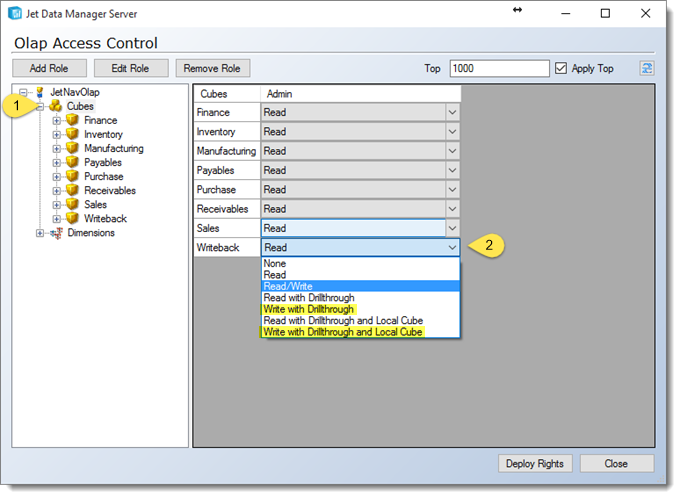
The Write with Drillthrough and Write with Drillthrough and Local Cube options will naturally inherit 'Read' permissions.
Upon selecting the permission set for each role and cube required, click on 'Deploy Rights' at the bottom right hand side of the window to push the permissions out to your server. You can then click 'OK' on the notification window that pops up and then click 'Close' within the OLAP Access Control window.
-
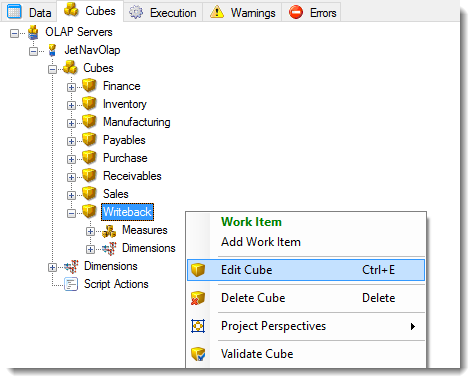
Now that security permissions have been granted, the next step is to edit the cube in which you are implementing writeback capabilities. For this, right-click on desired cube and select Edit Cube
In the Edit Cube window that opens, simply check the box next to Enable WriteBack as shown below and then click OK to continue.
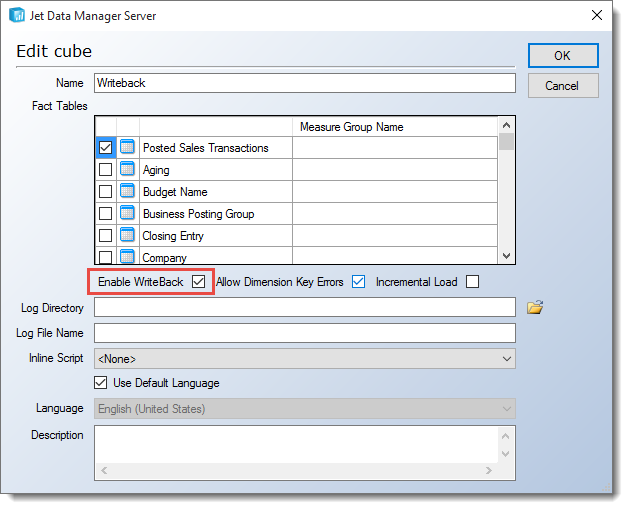
You will need to Deploy and Execute your cube after enabling Writeback.
-
Enabling Writeback within Excel
Once writeback is enabled on the cube and the necessary OLAP security permissions have been granted to your user(s), you can begin writing back data to your cube.
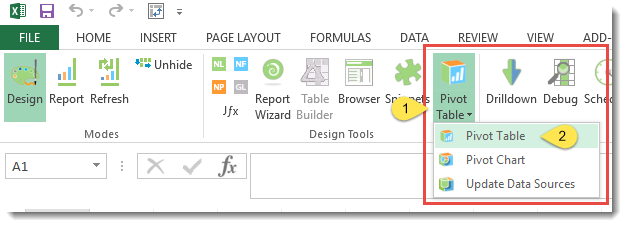
To start, open Microsoft Excel. From your Jet ribbon, click on the Pivot Table button and select the Pivot Table option.
In the window that opens up, select the data source and cube that you have enabled writeback on and then click OK to proceed.
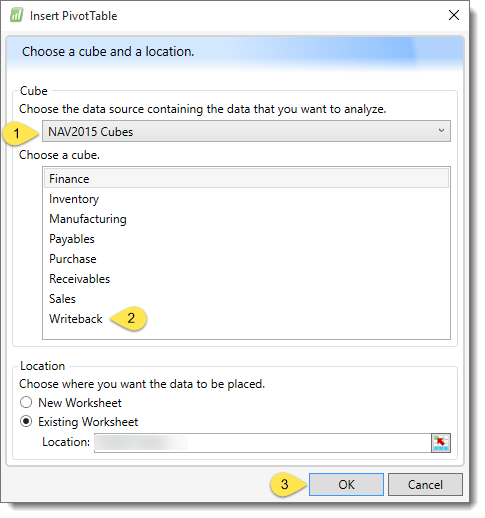
For more information on creating an OLAP data source in Jet Reports, please review this article
With your PivotTable built to your liking, first click anywhere in your PivotTable and then click on the Analyze tab in Excel and select OLAP Tools -> What-If Analysis -> Enable What-If Analysis.
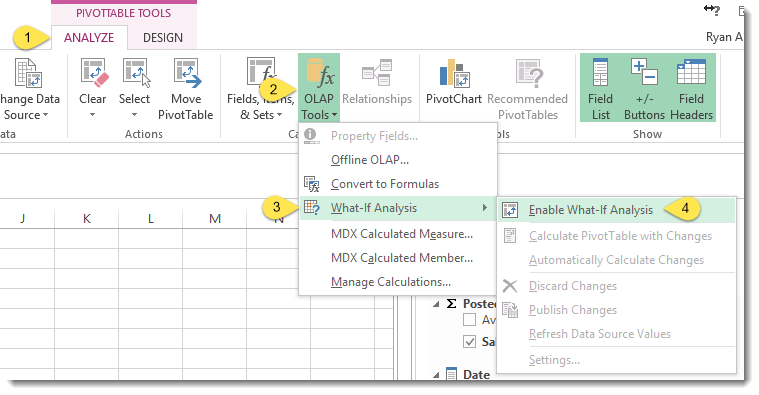 You will need to complete the step above and 'Enable What-If Analysis' for each new PivotTable you create within Excel.
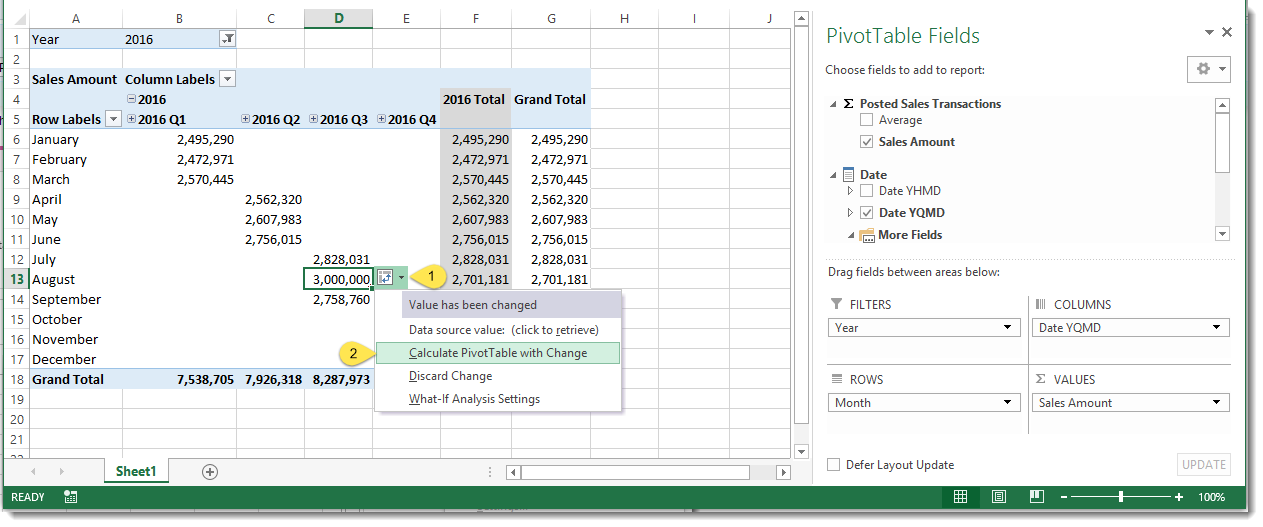
Once you have enabled What-If Analysis within Excel, click in any cell of your PivotTable and type in a value different than the original. Once a cell has been changed, you will see a small red triangle in the lower right corner of the cell. If you click on the cell, you will see a 'What-If Analysis Options' button available just to the right of the cell. To 'writeback' your changes to your cube, click on the 'What-If Analysis Options' and select Calculate PivotTable with Change
Comments