| Welcome to the Jet Reports Installation Guide |
|---|
| Installation and Setup |
Uploading Reports to Jet Hub |
Publishing Dashboards to Jet Hub |
Thank you for joining the Jet family of business users.
Here you'll find all the steps you'll need to download, install, activate, and configure Jet Reports.
This article is intended for the standard user. Administrators will want to see our Administrator's Guide.
Our Getting Started with Jet Reports article includes links to this and other articles to help you use Jet Reports
Installing Jet Reports
-
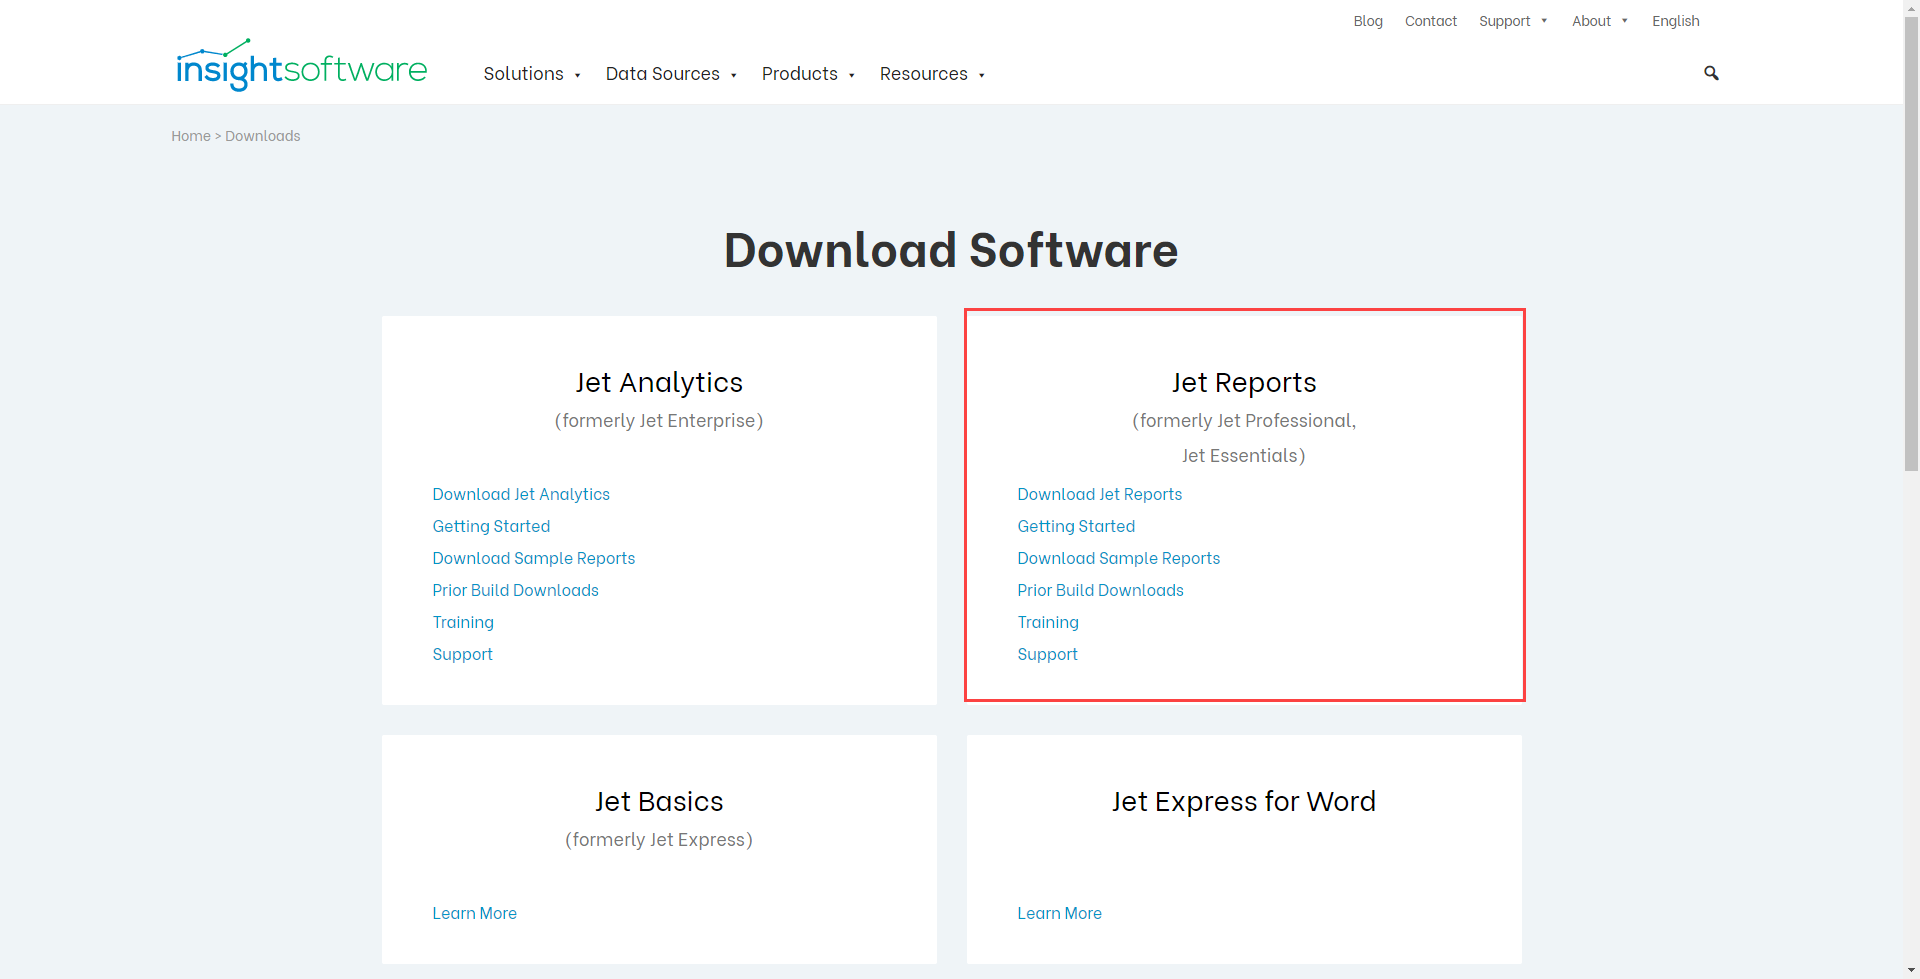
The installation program can be found here, Download Software
-
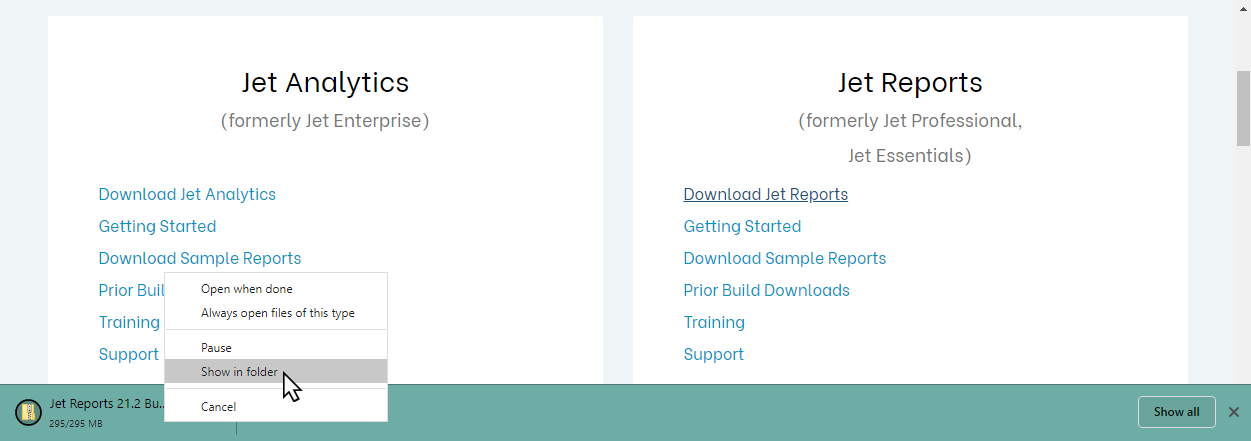
Find the downloaded file...
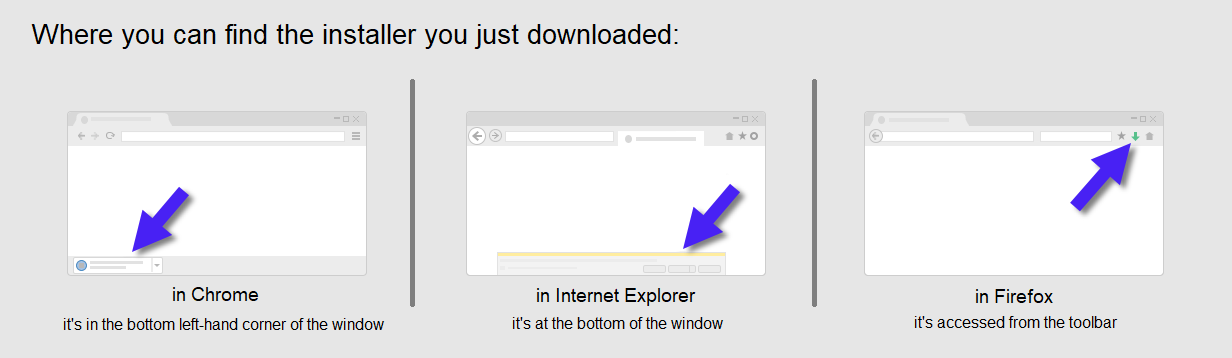
and go to the location where the file is saved...
-
Right-click on the file and extract its contents...
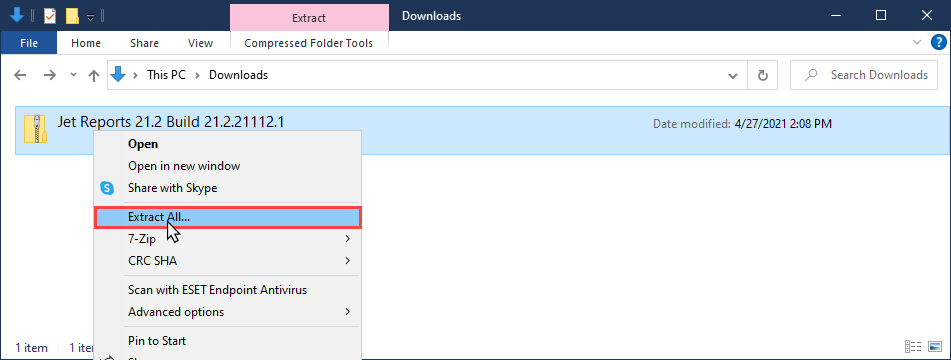 This will result in a folder with the same name as the zip file. Double-click to move into that folder.
 -
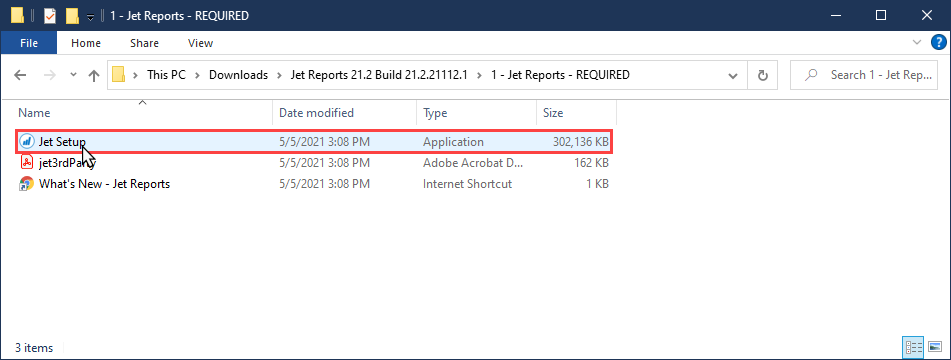
Under the folder 1 - Jet Reports - REQUIRED, run the Jet Setup.exe file.
Only one version of the Jet Excel add-in can be installed at a time. This makes upgrading your installation quite easy. By installing a newer version of the Jet Excel add-in, it replaces the older version.
 When upgrading between different versions, it is recommended to completely uninstall Jet before installing the version.
Activating your Jet License
-
After purchasing Jet Reports, you will be sent an Activation Code.
This code looks something like this:
12ABCD34-56E7-890F-A1BC-234D567EF89AFollow the Activation Instructions to activate your installation of Jet Reports.
Configuring your Jet Reports Data Source
The Jet Excel add-in supports data source connections to Dynamics NAV, Dynamics GP, Jet Analytics Cubes, and Jet Analytics Data Warehouses. In addition, you can define "Universal" data source connections to MSSQL databases as well as most databases that provide an OLE (preferred) or ODBC connector. Configure the settings for the data source license you received:
|
|
|
 |
|
|
 |
 |
Comments