Overview
Self-signed certificates are acceptable for testing anything used internal. By default, certificates created through Internet Information Services (IIS) on most Windows OS versions are based on the SHA-1 algorithm rather than the SHA-256 algorithm. SHA-1 certificates are less secure due to their smaller bit size and are in the process of being sunset by all web browsers.
Step-by-Step
-
Run PowerShell as administrator
-
Run the following command to create the certificate:
New-SelfSignedCertificate –DnsName <Computer name> -CertStoreLocation “cert:\LocalMachine\My”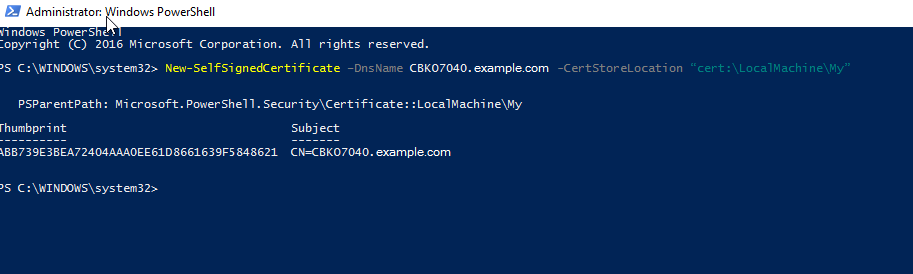 <Computer name> should be the name of the computer hosting the Jet Web Portal. It should be fully qualified with the domain name (computer.domain.com).
 -
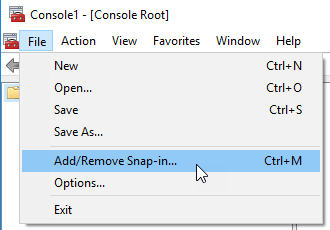
Next, we need to add the self-signed certificate as a trusted certificate authority...
Run MMC -32 as administrator
-
Select File > Add or Remove Snap-ins
-
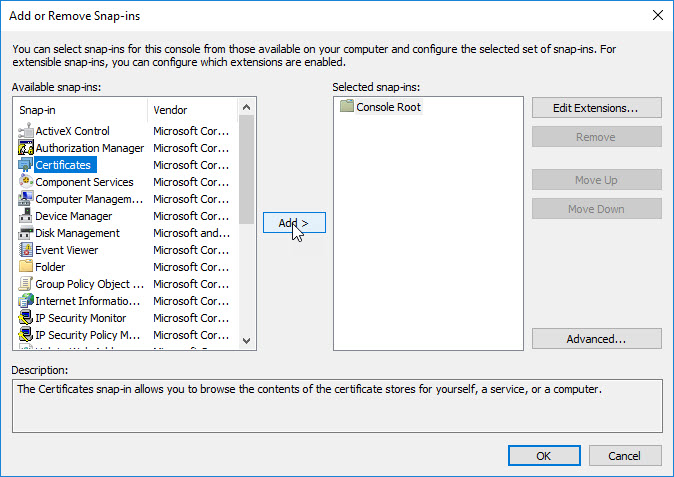
Select Certificates and then click Add
-
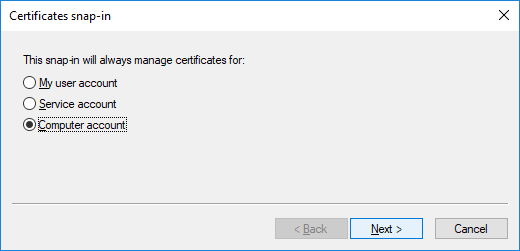
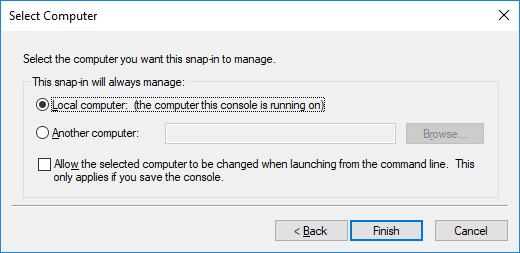
Select Computer account and press Next
-
Select Local computer, then click Finish. Then Click OK.
-
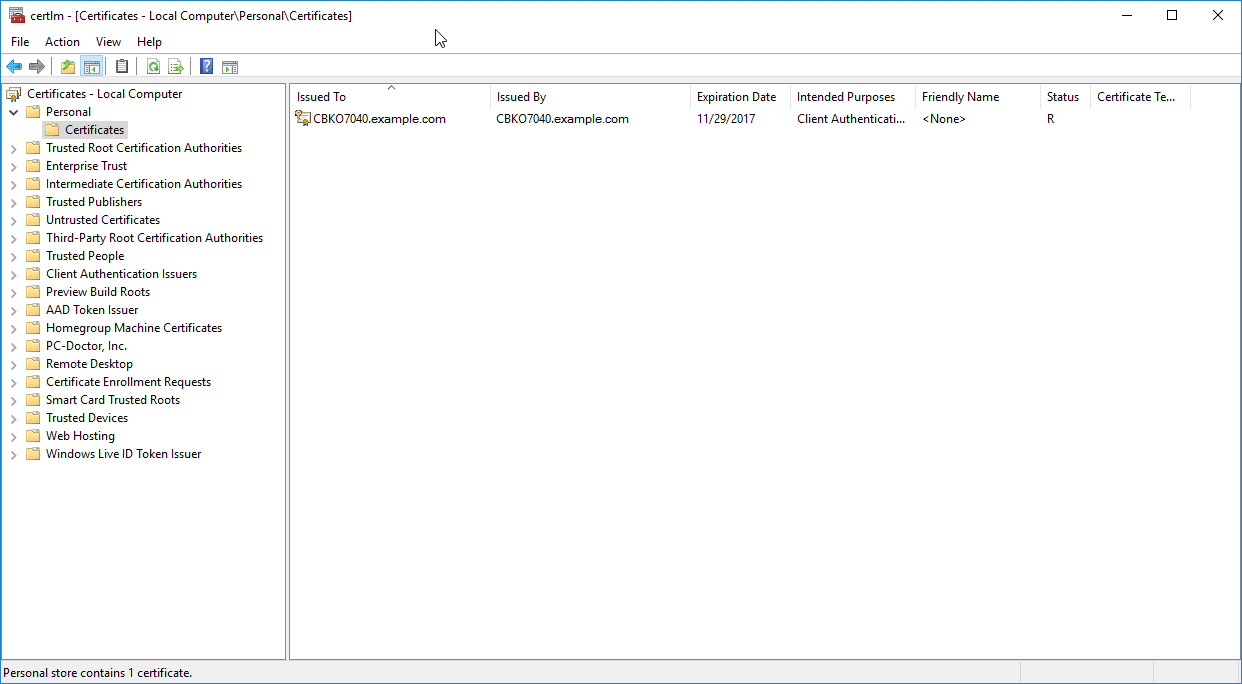
Find the certificate in Personal > Certificates:
-
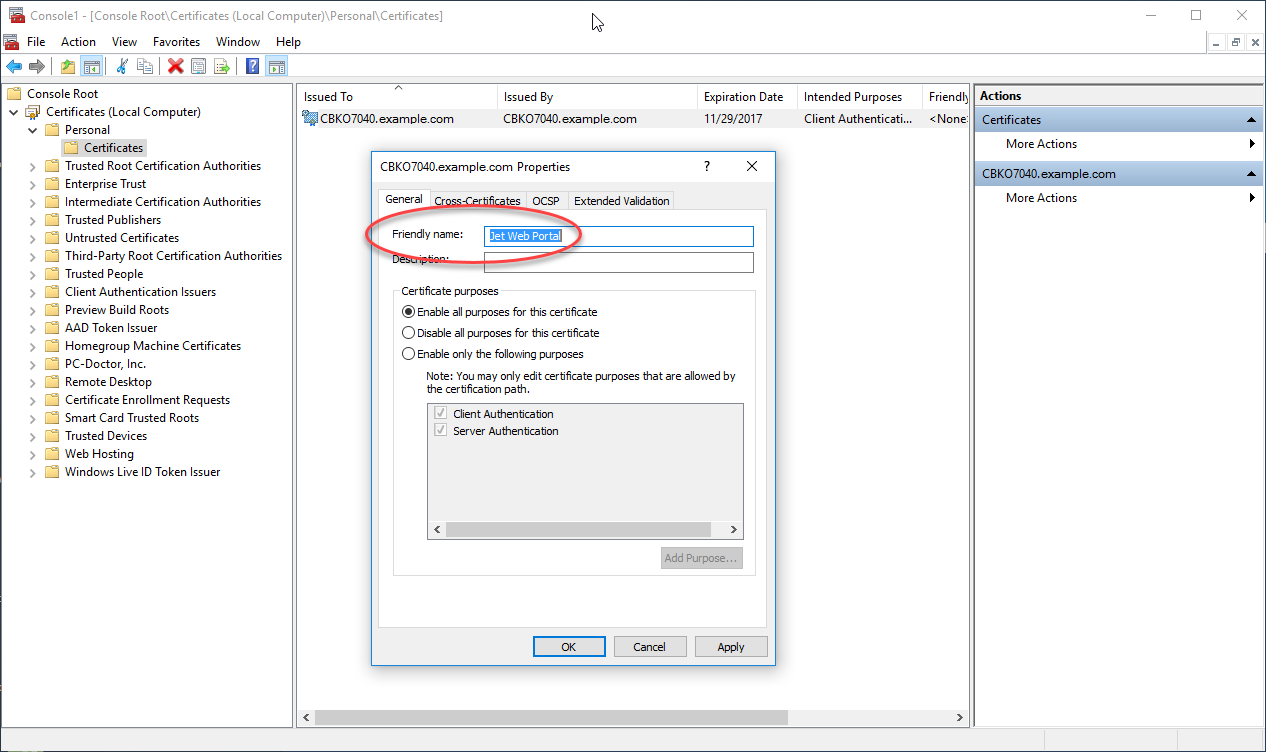
Right-click on the newly created certificate and then select Properties. Input the desired Friendly Name field for the certificate based upon what you are testing. Once completed, select the Apply button followed by OK.
-
Right-click on the certificate and choose Copy
-
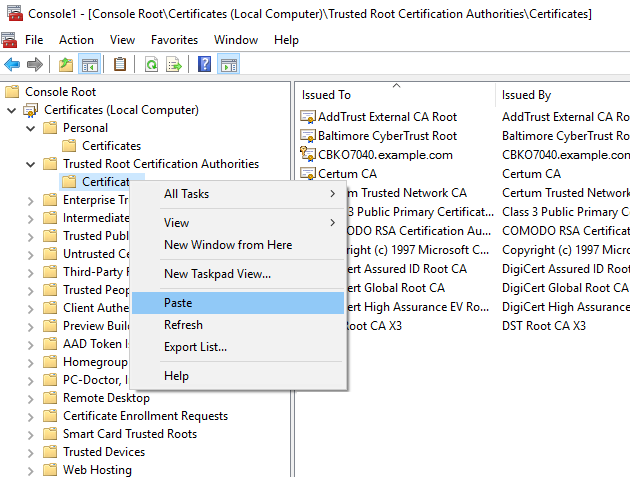
Expand Trusted Root Certificate Authorities
-
Right-click on the Certificates folder
-
Select Paste
-
In IIS Manager (usually requiring Administrator permissions), you can now see the self-signed certificate with SHA-256 as the SSL certificate.

Comments