Overview
Configuring a Jet Reports data source connection to your Dynamics 365 Business Central data require two steps:
- Installing the Jet Reports extension within your Business Central environment
- Setting up a Dynamics 365 Business Central data source within Jet Reports
Note that Multi-Factor authentication is natively supported with the Business Central (Public Cloud Web Services) Data Source in the Jet Excel Add-in.
Installing the Jet Reports Extension within Business Central
-
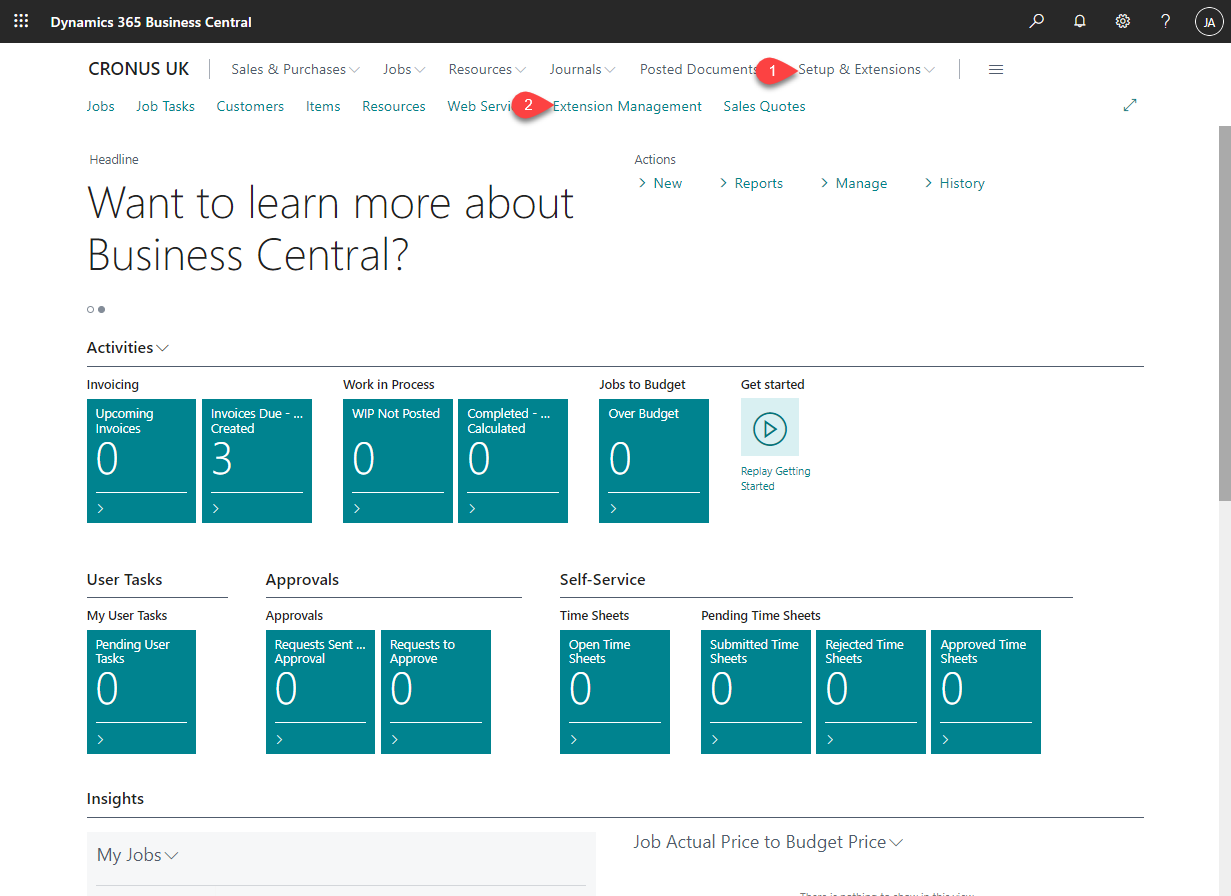
Log in to your Business Central environment.
From the home page, select Extensions from the Setup & Extensions menu.
-
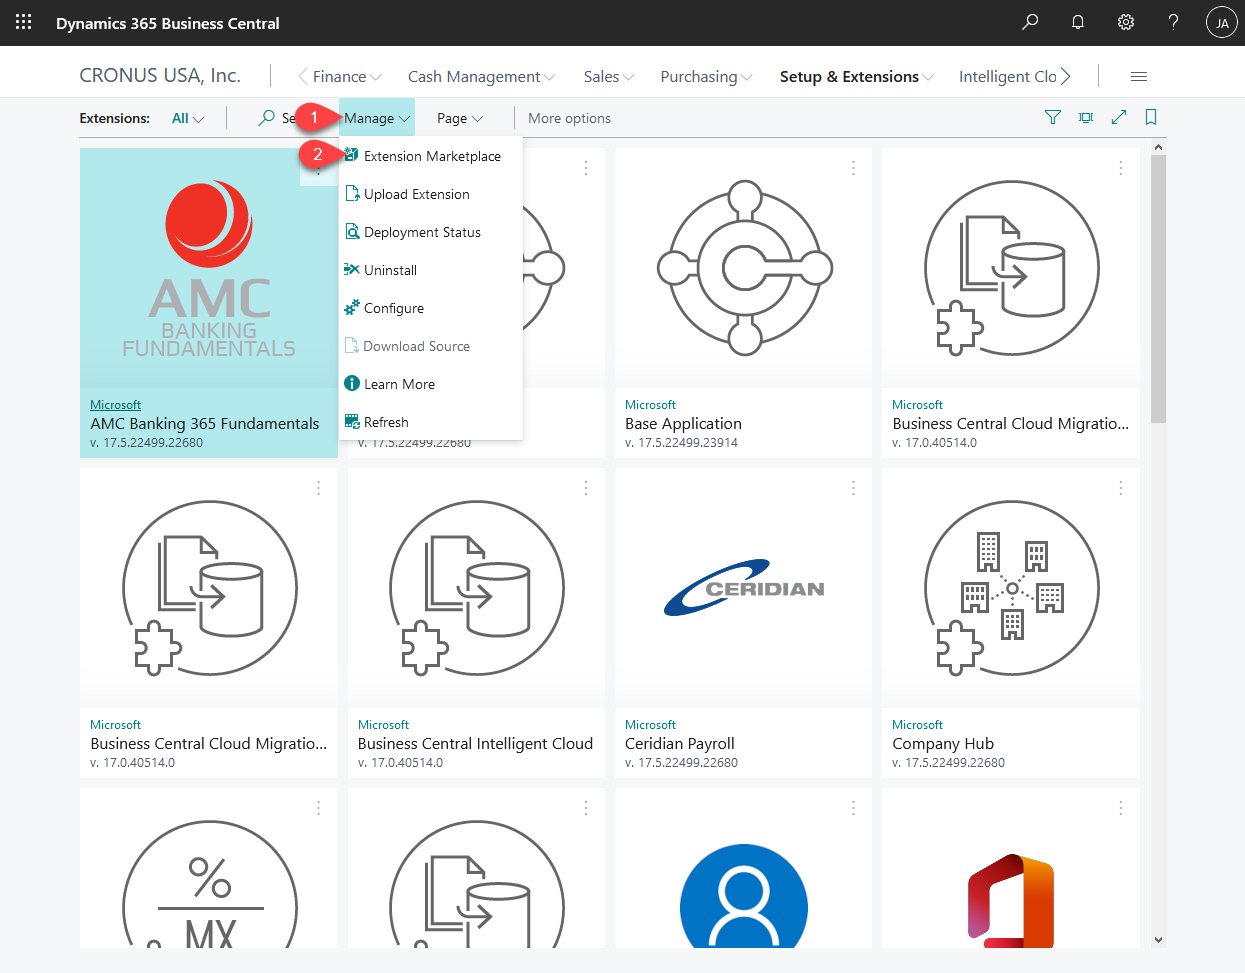
From the Extensions page, select Extension Marketplace from the Manage menu.
-
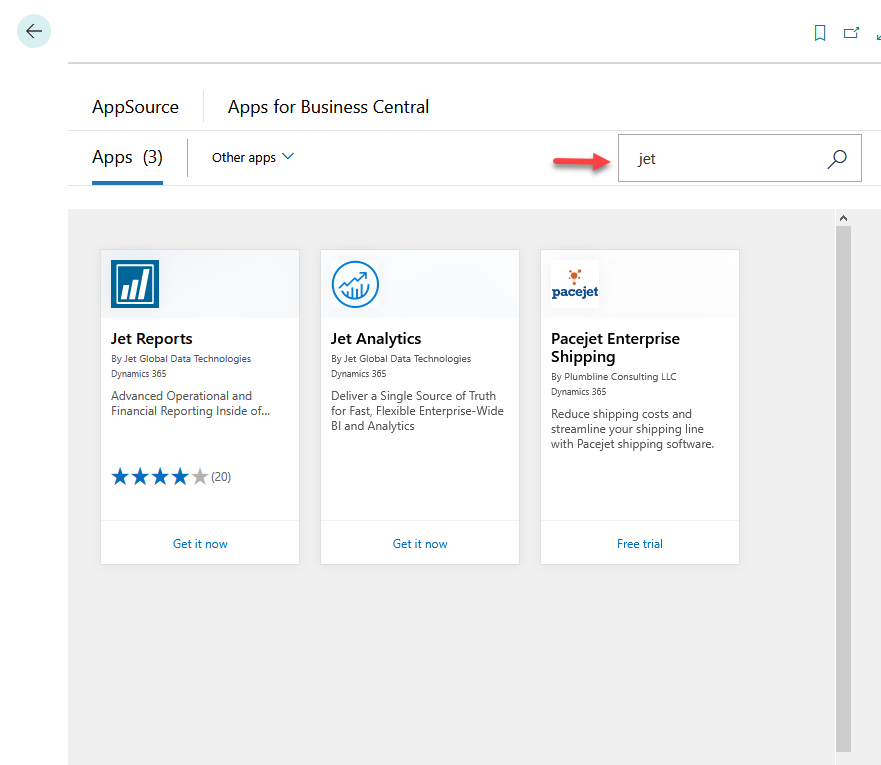
Search for Jet Reports and select the Jet Reports extension.
-
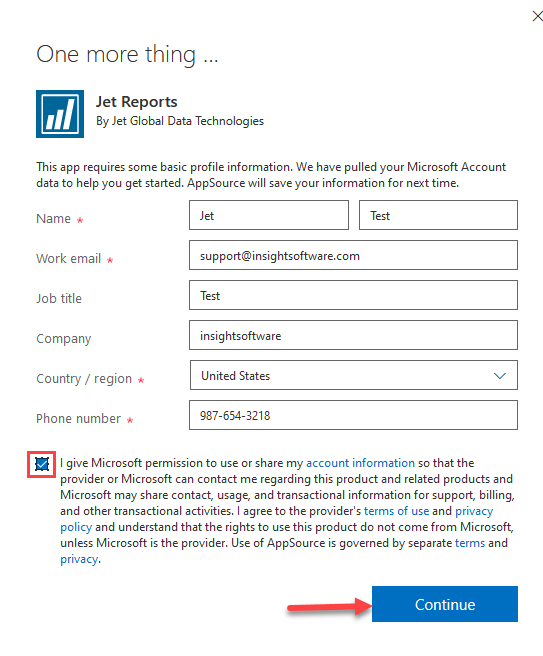
When prompted to agree to the terms of use and privacy policy, click Continue
-
Select the language that matches the language used in your Business Central environment
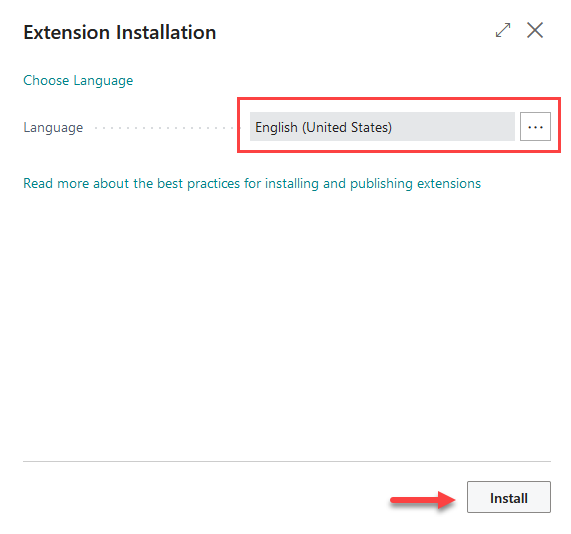
Click Install
Business Central will then begin the installation process:

-
Once the installation is complete, you can refresh your Extensions page and see the Jet Reports extension.

Creating a Jet Reports Connection to Business Central
-
From within Excel, go to the Jet ribbon and open your Data Source Settings.

-
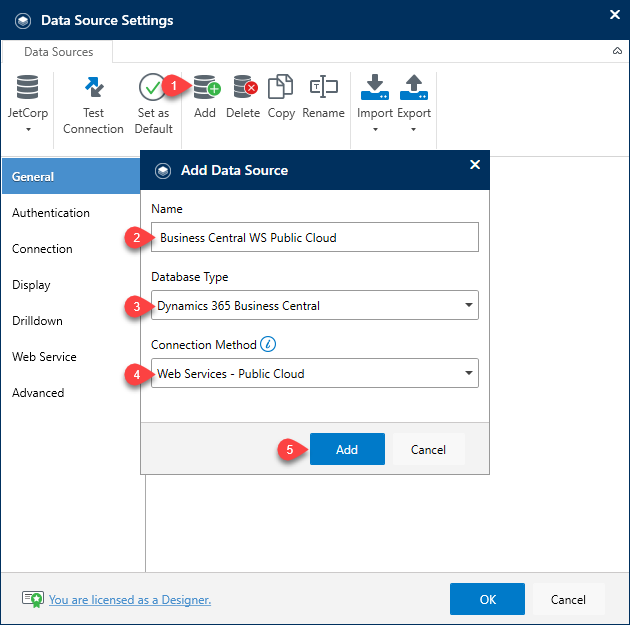
Click Add on the Data Source Settings tool bar.
In the Add Data Source dialog, give your data source a unique and descriptive name and then choose Dynamics 365 Business Central from the Database Type pull-down list.
Click the Add button
-
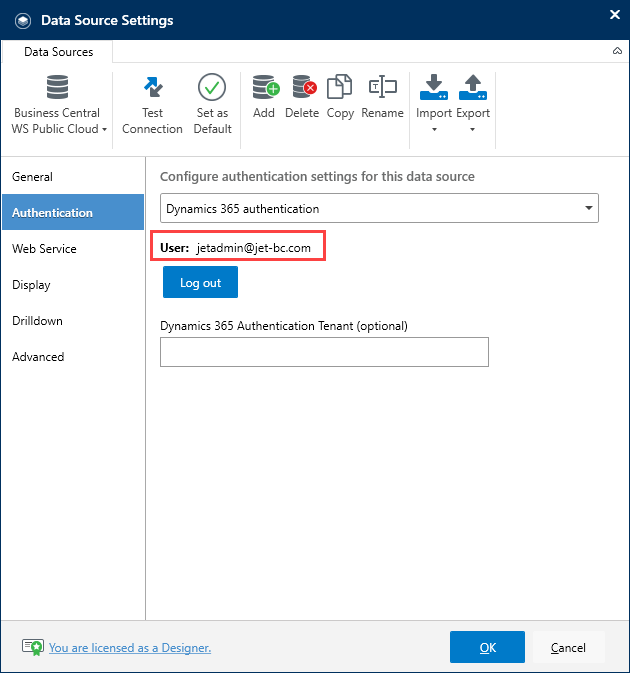
When prompted, select the account you wish to use to connect to your Business Central data. If prompted, provide the password.

-
Once the connection is made, the specified User name will be listed on the Authentication tab
-
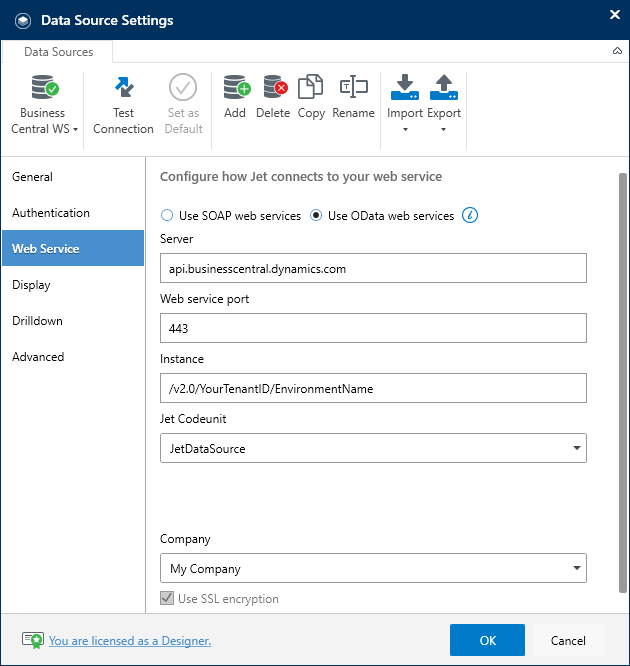
Next, navigate to the Web Service tab to confirm the instance of Business Central that the data source is targeting. It will initially target your default Tenant ID. If you have an environment specific name, you will need to add that to it. Please refer to the Using OData section of the article.
Please note, Microsoft announced changes in Business Central 2021 release wave 2 (version 19.0) that SOAP has been superseded by OData V4. It's recommended that integrations are migrated to OData V4 as soon as possible.
-
Click Test Connection to test your connection to the database

-
If you want your Business Central data source to be your primary data source, click Set as Default.
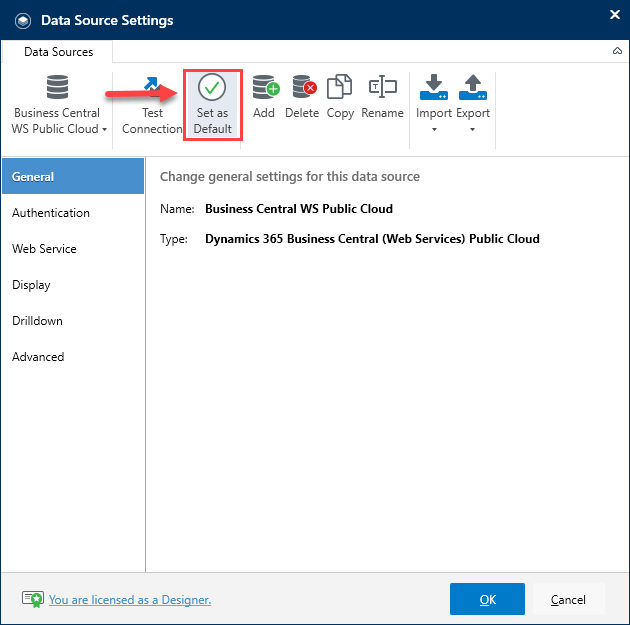
-
Click OK and your new Dynamics 365 Business Central data source is ready to be used in Jet Reports.
Using OData
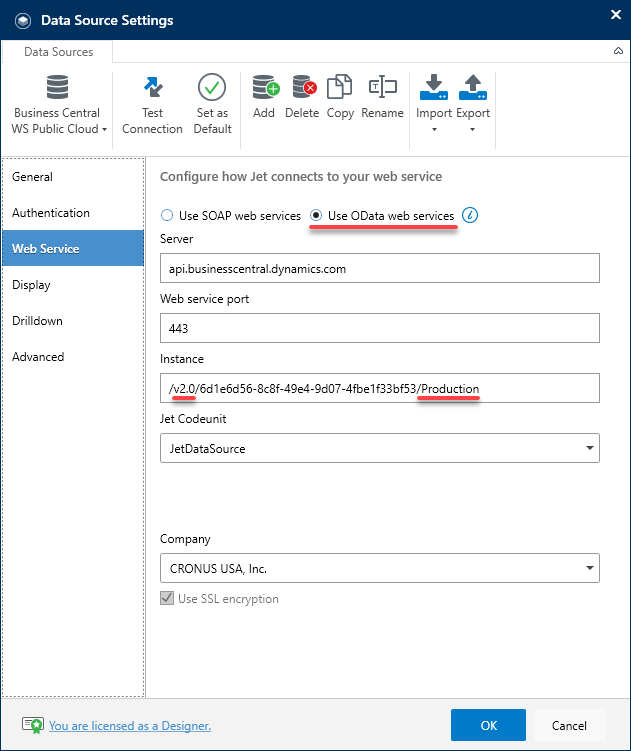
If you want to use OData rather than SOAP the following changes must be made to your data source configuration on the Web Service tab.
Please note, Microsoft announced changes in Business Central 2021 release wave 2 (version 19.0) that SOAP has been superseded by OData V4. It's recommended that integrations are migrated to OData V4 as soon as possible.
Please reference the following knowledgebase article from Microsoft for more information: Deprecated Features in the Platform - Clients, Server, and Database
-
Select the Use OData web services
-
Change the Instance to /v2.0/TenantId/EnvironmentName
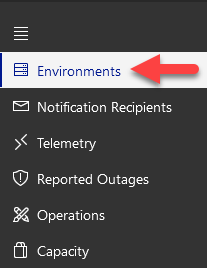
To find your environment name, a Business Central administrator can navigate to the Admin Center in your tenant and view Environments.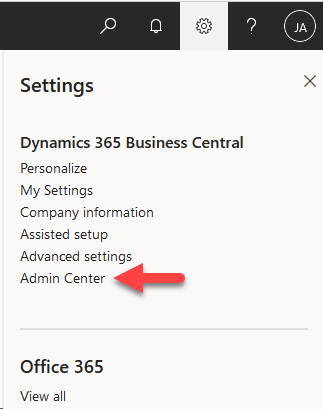
-
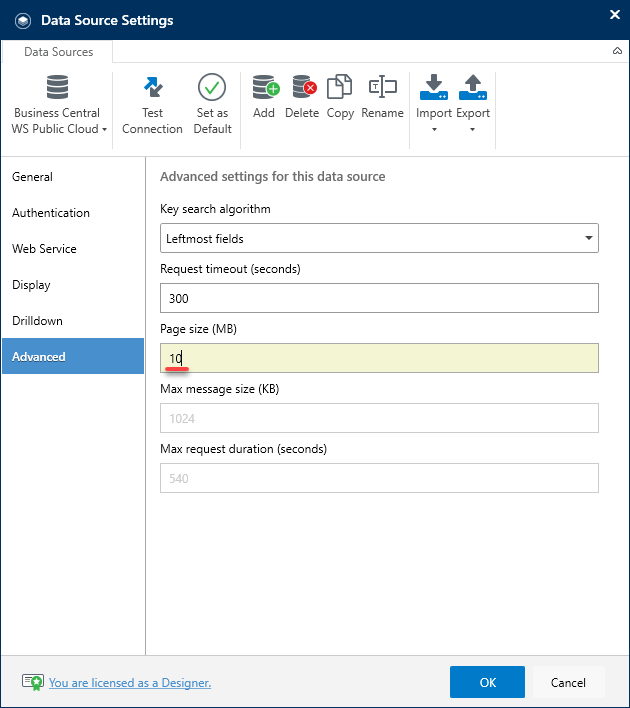
It is also recommended to change the Page size (MB) to 10 in the Advanced tab when using OData.
Comments